

TL;DR:
- Making a ring involves shaping a metal strip into a seamless circle through cutting, annealing, soldering, and polishing, using simple tools and materials like sterling silver. Proper seam preparation, controlled heating, and systematic finishing are essential for strong, professional-quality results. Practicing patience with filing, annealing, and sizing ensures durable, well-crafted rings and deepens understanding of jewelry craftsmanship.
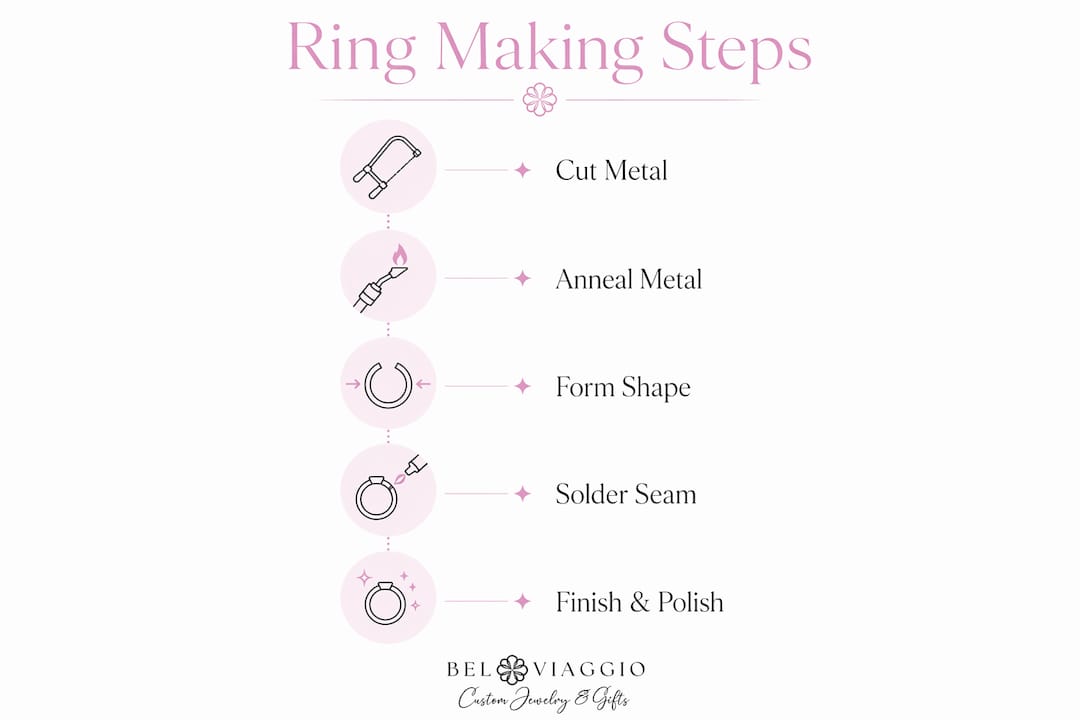
Making a ring means shaping a strip of metal into a seamless circle through cutting, annealing, forming, soldering, and polishing. This process, known in the trade as hand fabrication, is one of three core fabrication paths available to jewelry makers, alongside wax carving and CAD casting. You do not need a professional studio to make a ring at home. With a ring mandrel, a jeweler’s torch, and the right metal stock, you can produce a wearable, professional-quality band from scratch. This guide walks you through every stage, from selecting your materials to buffing the final polish.
What materials and tools do I need to make a ring?
Sterling silver is the best starting metal for DIY ring making. It is affordable, widely available in sheet and wire form, and forgiving enough to anneal and reshape multiple times without degrading. Copper and brass are even cheaper for practice runs. Gold is an option once your skills are solid, but its cost makes it unforgiving for beginners.
Essential tools for hand fabrication:
- Ring mandrel: A tapered steel rod used to shape and size the ring. Smooth surface is non-negotiable since dents on the mandrel transfer directly into the ring interior.
- Rawhide or nylon mallet: Shapes metal without marring the surface. Never use a steel hammer directly on unprotected metal during forming.
- Jeweler’s saw and blades: Cuts sheet metal to length with precision.
- Soldering torch: A butane or propane torch with a fine tip gives you control over heat direction.
- Flux and solder: Flux prevents oxidation during heating; silver solder in easy, medium, or hard grades bonds the seam.
- Pickle bath: A warm acid solution (sodium bisulfate is common and safer than traditional acids) removes firescale after heating.
- Files and sandpaper: Half-round files shape the seam; sandpaper from 320 to 800 grit refines the surface.
- Polishing compounds: Tripoli for cutting, Rouge for final shine.
Safety gear is not optional. Wear safety goggles when sawing and soldering. Use a respirator mask when pickling or polishing. Work in a ventilated space, especially when using a torch. A fire-resistant soldering block (charcoal or ceramic) protects your work surface.
Pro Tip: Buy a free ring sizer before you cut any metal. Cutting your strip to the wrong length is the most common beginner mistake, and it wastes material.
How do I anneal and form the metal into a ring shape?
Annealing is the process of heating metal to soften it before shaping. Without this step, bending sterling silver will cause it to work-harden and crack. Annealing sterling silver requires heating to 650 to 680°C until a dull cherry-red glow appears across the surface. In a bright room, this color is easy to miss, so dim your workspace lights slightly when annealing.
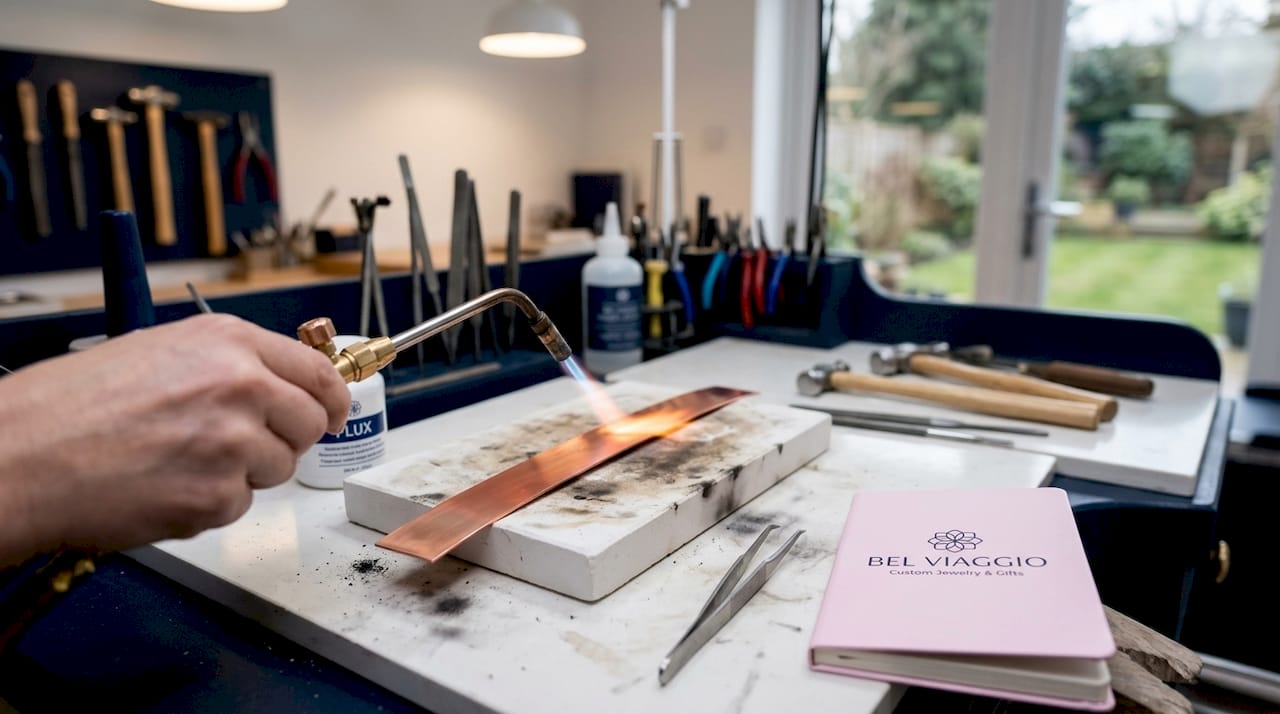
Place your metal strip on a charcoal or ceramic soldering block. Move the torch flame in slow, even passes across the entire length of the strip. You are not trying to melt the metal. You are heating it uniformly until that dull red appears, then pulling the flame away. Let the metal cool to black before quenching it in water or continuing to work it.
Once annealed, use your fingers and flat-nose pliers to begin curving the strip into a rough circle. Then place it over the mandrel and use the rawhide mallet to drive it down the taper, rotating as you go. The goal at this stage is a rough ring shape with the two ends nearly touching. Do not force the metal if it resists. Annealing cycles can be repeated indefinitely without degrading sterling silver, as long as you avoid overheating. If the metal stiffens during forming, stop and anneal again.
Pro Tip: Anneal your strip before you cut it to final length. A softened strip curves more predictably, and you waste less material correcting springback.
What is the step-by-step process to solder the ring and complete the band?
Soldering is where most beginners lose confidence, but the process is straightforward when you follow the correct sequence. The strength of a soldered joint depends entirely on seam preparation, not on how much solder you apply. Wide or uneven gaps cannot be filled by liquid solder, so the two ends must meet perfectly flush before you apply any heat.
- File the ends flush. Hold the ring with the seam facing up and use a flat file to work both ends until they are perfectly flat and parallel. Test by pressing the ends together with your fingers. You should feel them snap closed with light spring tension.
- Apply flux to the seam. Brush paste flux directly onto the joint. Flux prevents oxidation during heating and allows the solder to flow cleanly into the seam rather than balling up on the surface.
- Place the solder snippet. Cut a tiny piece of easy or medium silver solder (roughly 1mm square) and position it directly on the fluxed seam. It will stay in place as the flux dries slightly.
- Heat the ring evenly. Set the ring on your soldering block and begin heating the entire ring body, not just the seam. Move the flame in circles around the band. As the ring reaches temperature, direct the flame toward the seam. The solder will flow toward the hottest point. Watch for the bright silver flash that signals the solder has flowed through the joint.
- Quench and pickle. Let the ring cool for 10 seconds, then use copper tongs (never steel in pickle) to drop it into a warm pickle bath. Immerse the ring for 2 to 5 minutes to dissolve burnt flux and oxidation. Rinse thoroughly with water before continuing.
- File the solder joint smooth. Use a half-round file to remove any excess solder at the seam, then progress through sandpaper grits to blend the joint into the band.
Pro Tip: If your solder flows away from the seam, the seam is cooler than the surrounding metal. Pull the flame back slightly and let the heat equalize before trying again.
How do I finalize the ring with shaping, sizing, and polishing?
After soldering and pickling, your ring will likely be slightly out of round. Place it back on the mandrel and tap it down with the rawhide mallet, rotating a quarter turn between each strike. This restores roundness and also work-hardens the band slightly, which improves its durability.
Surface finishing follows a clear progression. Start filing excess solder flush, then progress sandpapers from 320 to 800 grit, working in one direction at each stage before switching to the next. Each grit removes the scratches left by the previous one. Skipping grits leaves visible scratches that polishing compounds cannot remove.
| Stage | Tool | Purpose |
|---|---|---|
| Coarse filing | Half-round file | Remove solder bumps and surface irregularities |
| Medium sanding | 320-grit sandpaper | Flatten file marks across the band |
| Fine sanding | 600 to 800-grit sandpaper | Refine surface texture before polishing |
| Pre-polish | Tripoli compound | Cut remaining micro-scratches |
| Final polish | Rouge compound | Produce a mirror-bright finish |
Apply Tripoli with a felt wheel on a rotary tool or by hand with a cloth. Follow with Rouge for the final shine. Keep the ring moving constantly against the wheel to avoid overheating one spot. After polishing, wash the ring with warm soapy water and a soft brush to remove compound residue.
Safety note: Polishing wheels grab rings aggressively. Always hold the ring firmly and keep fingers clear of the wheel’s rotation path.
What common mistakes should I avoid in ring making?
Every metalsmith makes these errors at least once. Knowing them in advance saves you time, metal, and frustration.
- Uneven seam gaps before soldering. This is the single most common failure. The joint’s strength depends on seam tightness, not solder volume. File until the ends snap together cleanly.
- Skipping annealing steps. Sterling silver work-hardens quickly. If you force a stiff ring around the mandrel without annealing, you risk cracking the metal at the bend.
- Overheating during soldering. If the ring glows orange-red rather than dull cherry, you have gone too far. Pull the flame away immediately. Overheating burns the flux, prevents solder flow, and can pit the metal surface.
- Using steel tongs in the pickle bath. Steel contaminates the pickle and deposits copper onto your silver ring. Always use copper, brass, or plastic tongs.
- Skipping the pickle bath. Pickling is a metallurgical step, not optional cleanup. Firescale that polishing alone won’t address forms during every heating cycle. A warm pickle bath at 50 to 60°C for 2 to 5 minutes removes it completely.
- Rushing through sandpaper grits. Jumping from 320 directly to polishing leaves visible scratches. Work through each grit in sequence.
The most common beginner mistake is adding more solder to fix a bad joint. More solder does not fix a gap. Better filing does.
Key takeaways
Successful ring making depends on precise seam preparation, controlled annealing, and systematic finishing rather than any single advanced technique.
| Point | Details |
|---|---|
| Anneal before every forming step | Repeat annealing cycles freely to keep sterling silver workable without degrading the metal. |
| File seams flush before soldering | Solder cannot bridge gaps; the joint’s strength comes from tight, flush contact between the two ends. |
| Pickle after every heating cycle | A warm pickle bath removes firescale that polishing compounds cannot fix on their own. |
| Progress sandpaper grits in sequence | Moving from 320 to 600 to 800 grit removes each layer of scratches before polishing begins. |
| Size accurately before cutting | Measure your finger with a ring sizer before cutting metal to avoid wasting material on the wrong length. |
What I’ve learned from making rings the hard way
I spent my first three months at the bench convinced that soldering was the hardest part of making a ring. It is not. Filing is. Specifically, the patience to file a seam until it is genuinely flush rather than “close enough.” Every failed solder joint I have ever seen traces back to a gap that looked acceptable but was not.
The other thing nobody tells beginners is that annealing is not a one-time setup step. It is a tool you reach for constantly throughout the forming process. I now anneal my metal before cutting, after rough forming, and again if the ring resists reshaping after soldering. The metal tells you when it needs it. If it feels stiff or springs back aggressively, anneal it.
On the question of tools: do not buy everything at once. A ring mandrel, a rawhide mallet, a basic torch setup, and a pickle bath will get you through your first ten rings. Add a rotary polishing tool once you know you enjoy the process. Spending heavily on equipment before you have made your first ring is a way of avoiding the actual work.
The creative payoff of DIY ring making is real. There is something genuinely different about wearing a piece you shaped yourself. If you want to understand what goes into a personalized ring design at a professional level, making one by hand gives you that perspective faster than any amount of reading.
— Stacy
Explore custom ring designs from Bel Viaggio Designs
If making a ring by hand has sparked your appreciation for craftsmanship, Belviaggiodesigns takes that same attention to detail to a professional level. Every piece is handcrafted to order using ethically sourced materials, with options spanning lab-grown diamonds, moissanite, and rare gemstones. The Black Diamond Halo Engagement Ring at 1.75 ctw is one of their most striking custom designs, built for buyers who want something that stands apart from standard retail. For a completely bespoke piece, Belviaggiodesigns offers a custom ring design deposit that starts the collaborative design process from scratch, with lifetime craftsmanship backing every order.
FAQ
What metal is best for a beginner making a ring?
Sterling silver is the best starting metal for DIY ring making. It is affordable, widely available, and can be annealed and reformed multiple times without degrading.
How do I know when sterling silver is fully annealed?
Sterling silver is fully annealed when it shows a dull cherry-red glow at 650 to 680°C. Work in a slightly dimmed space so the color change is visible.
Can I make a ring without a soldering torch?
Cold-connection techniques like riveting or tube setting allow some ring construction without a torch, but a soldered seam is required for a seamless metal band. A basic butane torch is inexpensive and sufficient for most beginner projects.
Why does my solder ball up instead of flowing into the seam?
Solder balls up when the seam is cooler than the surrounding metal, or when flux has burned off before the solder reached flow temperature. Heat the ring body evenly first, then direct the flame toward the seam to draw the solder in.
How do I figure out the correct ring size before cutting my metal strip?
Measure your finger with a ring sizing tool before cutting any metal. Add the thickness of your metal stock to the circumference measurement to account for the material that wraps around the mandrel.
Recommended
- Design a Ring Online Free: Your Complete 2026 Guide – Bel Viaggio Designs, LLC
- Custom ring guide: step-by-step ethical luxury (2026) – Bel Viaggio Designs, LLC
- Ring settings explained: types, styles & custom options – Bel Viaggio Designs, LLC
- Step-by-step ethical engagement ring workflow 2026 – Bel Viaggio Designs, LLC