

TL;DR:
- Choosing a stone arrangement depends on your goal, such as maximizing sparkle or protecting the stone. Belviaggiodesigns custom-builds rings around precise stone dimensions, ensuring a perfect fit before fabrication begins. The most common styles include solitaire, halo, pavé, bezel, channel, and three-stone, each with unique visual and functional advantages.
The most common stone arrangements in custom rings are solitaire, halo, pavé, bezel, channel, three-stone, cluster, side-stone, east-west, bypass, and tension. The short rule: choose halo or pavé to maximize sparkle, bezel or channel to protect the stone, a three-stone or cluster layout to emphasize color and size, and east-west or bypass for a modern, architectural look.
Quick picks by goal:
- Maximize sparkle → halo or pavé
- Protect a fragile or active-lifestyle gem → bezel or channel
- Show off color or create vintage detail → cluster or three-stone
- Modern, sculptural look → east-west, bypass, or tension
Custom ring timelines can vary significantly depending on complexity. When center-stone quality is the priority, jewelers generally recommend allocating 60–75% of the total budget to the center stone and the remainder to the setting. Belviaggiodesigns builds each ring around the chosen stone’s exact dimensions, so the setting always fits the gem rather than the other way around.
Table of Contents
- What are the most common stone arrangements in custom rings?
- Which settings pair best with each arrangement?
- How do you choose an arrangement for your custom ring?
- What size and shape pairings make multi-stone rings look balanced?
- What do custom multi-stone rings cost, and how long do they take?
- Can a jeweler add stones to an existing ring?
- How do you care for a multi-stone ring?
- How do you prepare visuals and references for your designer?
- How Belviaggiodesigns supports your stone arrangement choices
- Key Takeaways
- The detail most buyers overlook
- Start your custom stone arrangement with Belviaggiodesigns
- Useful sources and further reading
- FAQ
What are the most common stone arrangements in custom rings?
Every arrangement below is a distinct design language. Knowing what each one does visually helps you walk into a consultation with a clear direction.
Solitaire
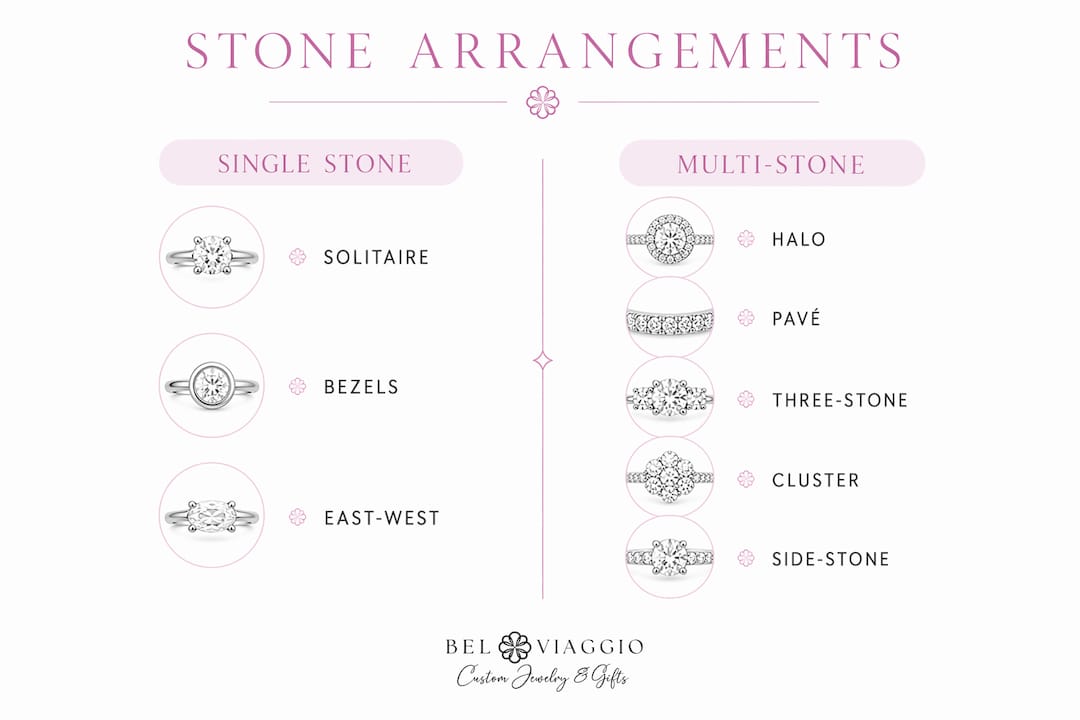
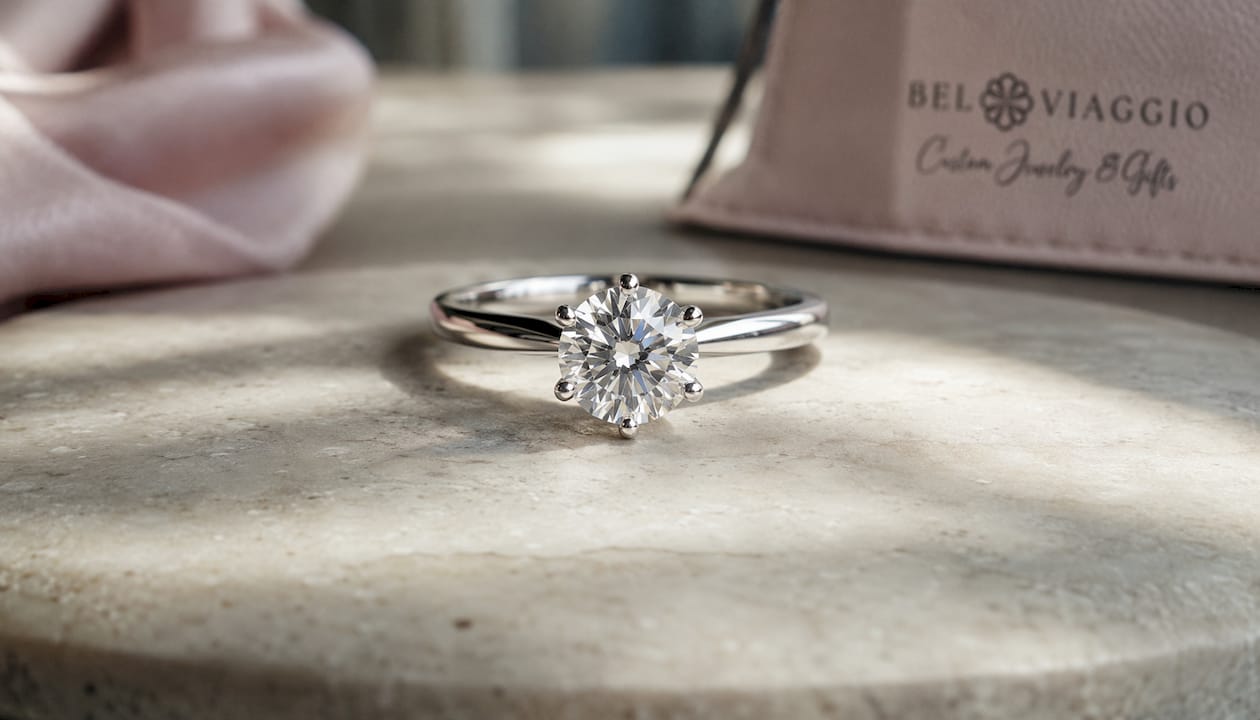
One center stone, nothing else competing for attention. The stone sits on a plain or lightly detailed band, and all the light goes straight to the gem. A round brilliant in a four-prong solitaire is the most classic engagement ring in existence, but the format works equally well with ovals, cushions, and emerald cuts. If you want the stone to do all the talking, this is the layout.
Halo
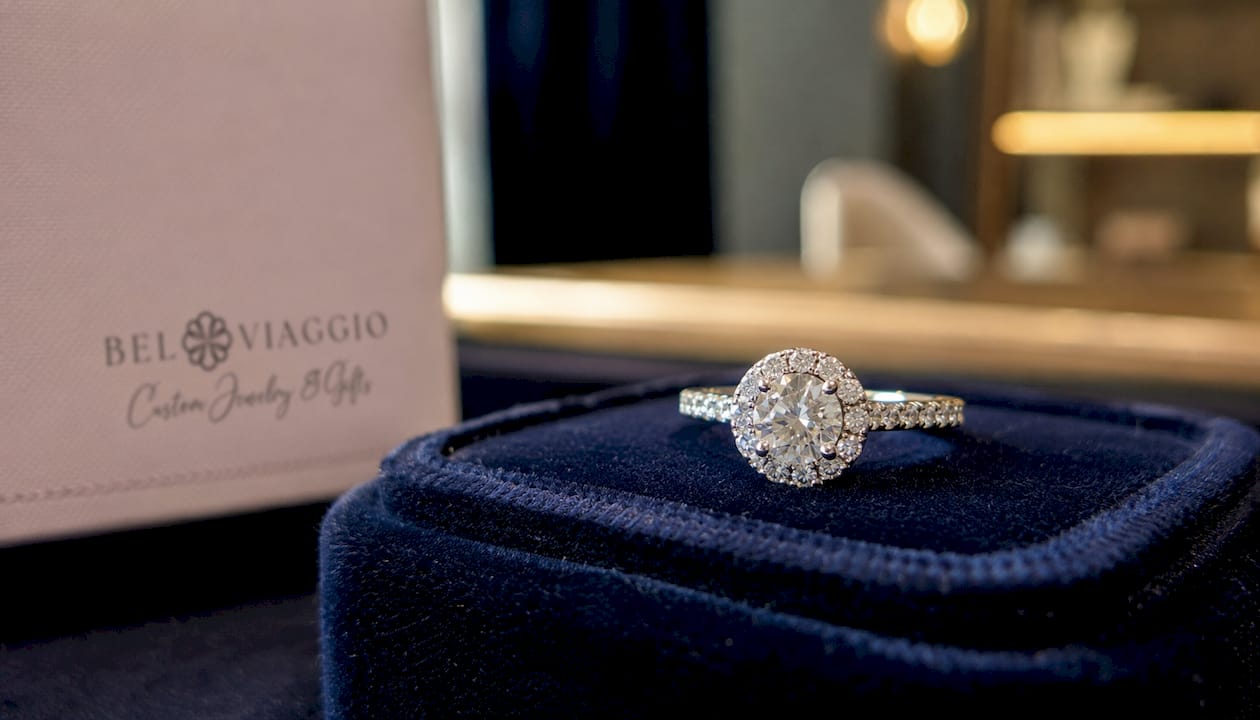
A ring of small accent stones surrounds the center, creating a larger visual footprint. A 0.6 ct center stone in a well-proportioned halo can read like a 0.9 ct stone from across a table. Double halos push that effect further, though they also widen the profile and can overwhelm a narrow finger. The halo is the single most effective arrangement for making a center stone look bigger without paying for more carats.
Pavé
Small diamonds or gemstones are set closely together along the band, held by tiny prongs or beads. The result is a continuous shimmer that wraps the finger. Micro-pavé uses stones under 1.3 mm and delivers a finer, more delicate texture. Standard pavé uses slightly larger stones and reads bolder. Either way, pavé settings require more frequent professional checks because the small prongs can loosen over time.
Bezel
A thin rim of metal wraps completely around the stone’s girdle, holding it flush. No prongs, no exposed edges. The bezel is the most protective setting available and suits active wearers, softer gemstones, and anyone who works with their hands. The trade-off is that the metal rim blocks some side light, which slightly reduces brilliance compared to a prong setting.
Channel
Stones sit in a groove cut into the band, with metal walls on either side holding them in place. No prongs at all. Channel settings are clean, modern, and very secure. They work best with uniform-sized stones, typically round or princess cuts, and are common in wedding bands and anniversary rings.
Three-stone (trilogy)
A center stone flanked by two side stones. The traditional read is past, present, and future. The arrangement draws the eye across the width of the ring and creates a strong horizontal presence. The 2:1:1 size ratio is the standard starting point: if the center is 1.0 ct, each side stone is roughly 0.5 ct. You can see a well-executed version in Belviaggiodesigns’s morganite three-stone ring, where a pastel center pairs with lab-grown diamond accents.
Cluster
Multiple smaller stones grouped tightly to mimic a single large stone or create a floral, starburst, or geometric shape. Clusters are a smart budget move: a cluster of smaller stones can cost significantly less than a single stone of equivalent visual size. They also offer a vintage or art-deco feel that solitaires and halos can’t replicate.
Side-stone
A center stone with accent stones set along the shank, typically tapering toward the back. The side stones add sparkle and frame the center without the full encirclement of a halo. This is a flexible format that works with almost any center shape.
East-west
The center stone is rotated 90 degrees so its length runs horizontally across the finger rather than vertically. An east-west oval or marquise reads dramatically different from the same stone set in the traditional orientation. It’s a low-effort way to make a familiar shape feel unexpected.
Bypass
Two shanks that curve past each other without meeting, often cradling the center stone between them. The open space between the shanks creates a sculptural, architectural look. Bypass rings tend to sit higher on the finger and suit longer fingers well.
Tension
The stone appears to float between two ends of the band, held in place by the spring tension of the metal. No prongs, no bezel. The effect is striking and very modern. Tension settings require precise engineering and are not easily resized, so they’re best suited to wearers with a stable ring size.
Design note: The setting should always be built around the stone’s exact dimensions, not the other way around. A tension or bezel setting engineered for a 7 mm round will not safely hold a 7.2 mm stone — even a fraction of a millimeter matters.
Pro Tip: Before committing to an arrangement, search for photos of that arrangement on your specific finger shape. A halo that looks proportional on a slender finger can look oversized on a wider one. Ask your jeweler for a scaled CAD render before any metal is cut.
Which settings pair best with each arrangement?
The arrangement is the layout; the setting is the mechanical method that holds each stone in place. They’re related but not the same. A three-stone arrangement, for example, can use prong settings, bezel settings, or a mix of both. Here’s how the most common setting types interact with each arrangement across the dimensions that actually matter.
| Arrangement | Visual effect | Durability / protection | Best for | Compatible stone shapes | Maintenance needs | Labor complexity |
|---|---|---|---|---|---|---|
| Solitaire (prong) | Maximum brilliance, stone-forward | Moderate — prongs can catch | Any lifestyle; classic look | Round, oval, cushion, pear, emerald | Prong check every 12–18 months | Low |
| Halo | Size illusion, high sparkle | Moderate — small accent prongs | Maximizing visual size on a budget | Round, oval, cushion, pear | Frequent prong checks; micro-pavé halo needs more care | Moderate–high |
| Pavé band | Continuous shimmer along shank | Lower — small prongs loosen | Sparkle-focused; not ideal for heavy manual work | Round, small accent cuts | Every 6–12 months professional check | High |
| Bezel | Clean, modern; slightly reduced brilliance | Highest — full metal rim | Active wearers, softer gems (morganite, aquamarine) | Round, oval, emerald cut | Low — occasional metal wear check | Moderate |
| Channel | Streamlined, flush surface | High — no exposed prongs | Active lifestyles; wedding bands | Round, princess, baguette | Low — check for metal wall wear | Moderate |
| Three-stone (prong) | Width emphasis, color contrast | Moderate | Classic, meaningful design | Round, oval, pear, emerald + baguette sides | Prong check every 12–18 months | Moderate |
| Cluster | Vintage / floral; high sparkle | Lower — many small prongs | Vintage aesthetic; budget-conscious | Mixed small cuts | Frequent checks; more prongs = more risk | High |
| Tension | Floating, ultra-modern | High when engineered correctly | Minimalist; stable ring size | Round, princess, oval | Annual check for metal fatigue | Very high |
| East-west / bypass | Architectural, unexpected | Moderate | Fashion-forward; longer fingers | Oval, marquise, elongated cuts | Standard prong or bezel check | Moderate |
Pro Tip: For softer gemstones like morganite (Mohs 7.5–8) or aquamarine (Mohs 7.5–8), a bezel or channel setting is worth the slight reduction in brilliance. Prong settings leave the girdle exposed, and a hard knock can chip a softer stone at the prong contact point. Sapphire (Mohs 9) handles prongs well; morganite does not.
Key trade-off summary:
- Prong settings maximize light entry and brilliance but need periodic tightening.
- Bezel settings protect the stone completely but reduce side light by roughly the width of the metal rim.
- Channel settings are secure and snag-free but limit stone shape options.
- Pavé and cluster settings look spectacular but carry the highest maintenance burden because of the number of small prongs involved.
How do you choose an arrangement for your custom ring?
Answer these five questions in order, and the arrangement usually becomes obvious.
- What is the primary goal? Sparkle, size illusion, color emphasis, protection, or a specific aesthetic (vintage, modern, minimalist)?
- What is the wearer’s lifestyle? Active, hands-on work, or primarily office/social wear?
- What stone shape and approximate size are you starting with? The stone’s proportions constrain which arrangements work.
- How is the budget split? Allocate 60–75% to the center stone when optical quality is the priority; shift that ratio toward the setting only when an elaborate design is the goal.
- What is the timeline? Simple solitaires take 4–6 weeks; complex multi-stone designs take 10–16 weeks.
Questions to ask your jeweler
Bring this list to your first consultation. The answers will tell you quickly whether a jeweler is experienced with custom work.
- Can this setting be adapted for my stone’s exact girdle dimensions and depth?
- What maintenance will this arrangement require annually?
- Can you show me CAD renders from multiple angles, including a top-down view?
- Will you provide a wax model or 3D-printed prototype before fabrication?
- What is the deposit structure, and at what stage can I still request changes?
- How do you handle stones I supply versus stones you source?
- What is your policy if a stone is damaged during setting?
You can find a fuller version of this checklist in Belviaggiodesigns’s guide to essential questions for custom rings.
Pro Tip: CAD renders are the last low-cost checkpoint. Once the wax model is approved and casting begins, changes cost real money. Request a stone-to-scale composite image — your actual stone dimensions overlaid on the CAD render — so you can see exactly how the center will sit relative to the band width and any accent stones.
Budget allocation
The 60–75% center-stone guideline applies when the stone’s optical quality (cut, color, clarity) is the main event. If you’re designing an elaborate vintage setting with filigree, milgrain, or extensive pavé, the setting labor can legitimately consume a larger share. Pavé and filigree work require significantly more bench time than a plain solitaire shank, and that labor cost is real.
What size and shape pairings make multi-stone rings look balanced?
The 2:1:1 rule and when to break it
The 2:1:1 guideline is the standard starting point for three-stone rings: the center stone should be visually twice the size of each side stone. For a 1.0 ct round center, that typically means two side stones around 0.40–0.50 ct each. For a 0.5 ct center, side stones around 0.20–0.25 ct. For a 2.0 ct center, side stones in the 0.75–1.0 ct range.
The rule exists because equal-sized stones compete rather than frame, and dramatically undersized side stones look like afterthoughts. That said, designers break it intentionally for specific effects: a three-stone ring with a large oval center and two small trillion side stones creates a very different silhouette than the classic 2:1:1 proportion, and both are valid.
Shape compatibility
- Emerald center + baguette sides: The rectangular geometry matches cleanly. The step-cut faceting on both creates a calm, architectural look.
- Oval center + round sides: The most forgiving combination. Round side stones complement almost any center shape.
- Pear center + round or trillion sides: The pear’s asymmetry needs a side stone that doesn’t fight it. Rounds work; trillions echo the angular tip.
- Cushion center + half-moon sides: The curved half-moon hugs the cushion’s rounded corners and creates a seamless silhouette.
- Round center + tapered baguettes: A classic Art Deco pairing. The taper draws the eye inward toward the center.
For colored-stone inspiration across these shapes, Belviaggiodesigns’s gemstone ring collection shows several of these pairings in finished form.
Color pairing guidance
White accent diamonds around a colored center stone amplify the center’s color by contrast. A deep blue sapphire surrounded by colorless round diamonds looks more saturated than the same sapphire set alone. Tonal matching (using accent stones in a lighter shade of the same color) creates a softer, more romantic effect. The emerald and diamond ring at Belviaggiodesigns is a good example of the contrast approach: white diamond accents make the green center pop.
Pro Tip: When pairing colored side stones with a colored center, keep the side stones one to two shades lighter than the center. If they match exactly, the eye loses the center as the focal point.
Jewelers advise separating the stone budget from the setting budget entirely. Prioritize the center for optical quality first, then choose a setting that complements the stone’s proportions and the wearer’s lifestyle.
What do custom multi-stone rings cost, and how long do they take?
Timeline by complexity
| Design complexity | Example type | Typical lead time |
|---|---|---|
| Simple | Solitaire, plain bezel | 4–6 weeks |
| Moderate | Halo, pavé shank | 6–8 weeks |
| Complex | Vintage, filigree, milgrain | 8–12 weeks |
| Very complex | Multi-stone, elaborate pavé | 10–16 weeks |
Plan for the upper end of any range if you’re supplying your own stone, since the jeweler needs time to verify dimensions before designing the setting.
Primary cost drivers
- Center stone: Carat weight, cut quality, color, and clarity are the dominant variables. A 1.0 ct lab-grown diamond costs a fraction of a comparable natural stone.
- Metal choice: Platinum costs more than white gold in both material and labor, since platinum is denser and harder to work.
- Setting complexity: Filigree, milgrain, and pavé require substantially more bench time than a plain shank. This is where many buyers underestimate total cost.
- Number of accent stones: Each additional stone adds material cost and setting labor.
- Finishing details: Hand engraving, custom gallery work, and mixed-metal shanks all add time and cost.
Custom design typically involves a deposit at the start of the process, with the balance due before shipping. Belviaggiodesigns uses a custom-design deposit structure that locks in the design consultation and CAD work.
Statistic note: Allocating 60–75% of the total ring budget to the center stone is the standard jeweler recommendation when center-stone quality is the priority. The remaining 25–40% covers metal, setting labor, and any accent stones.
If you’re ordering remotely, factor in insured shipping for any stones you’re supplying. A stone lost in transit without insurance is an unrecoverable cost.
Can a jeweler add stones to an existing ring?
Yes, in many cases. The feasibility depends on the ring’s current design and the type of modification needed.
Common methods for adding stones
- Head replacement: The existing prong head holding the center stone is replaced with a new one sized for a different stone. This is the cleanest solution when only the center is changing.
- Additional settings: Small bezels or prong clusters are soldered onto the shank to add accent stones. This works well for plain bands receiving small accents.
- Flush (gypsy) setting: Small stones are set directly into the metal surface of the band, with the metal burnished over the stone’s edge. Low-profile and very secure.
- Tube setting: A small metal tube is set into the band, and the stone drops into it. Common for adding small round accents to a plain shank.
- Replacing the mounting: When the existing setting is too elaborate or structurally incompatible, the entire mounting is replaced while the stone is retained.
Adding gems to an existing ring is straightforward for plain bands but can require a full remake when the original design is intricate. A jeweler will refuse modification when the structural integrity of the shank is compromised, when the new stone’s girdle thickness doesn’t match the existing seat, or when soldering near heat-sensitive stones (like emeralds or opals) poses a risk.
Before any modification: Always confirm the new stone’s exact millimeter dimensions with the jeweler before the design is finalized. A stone that is 0.2 mm wider than the seat will not set safely, and grinding the seat to fit can weaken the prong.
The technical process for prong setting involves seat cutting (creating a ledge inside the prong for the stone to rest on), prong shaping, and burnishing the prong tip over the stone’s girdle using a prong pusher and burnisher. This is bench work that requires proper tools and training. The step-by-step prong-setting process is documented in detail by Halstead for jewelers and advanced students, but it is not a DIY task for an unequipped home workspace.
When a jeweler will decline the modification:
- The shank is too thin to accept additional settings without cracking.
- The existing stone is heat-sensitive and cannot be removed safely.
- The new stone’s dimensions are incompatible with the existing seat geometry.
- The ring has already been sized multiple times and the metal is fatigued.
How do you care for a multi-stone ring?
Multi-stone rings have more contact points between metal and stone, which means more places for dirt to accumulate and more prongs to monitor.
Daily and weekly care:
- Remove the ring before applying lotion, sunscreen, or cleaning products. Residue builds up under pavé stones and dulls brilliance faster than almost anything else.
- Rinse under warm water with a drop of mild dish soap and a soft toothbrush weekly. Scrub gently under the setting where buildup collects.
- Avoid ultrasonic cleaners for rings with fracture-filled stones, emeralds, or opals. The vibration can worsen existing inclusions.
- Store in a fabric-lined box or pouch, not loose in a drawer where stones can scratch each other.
Professional maintenance schedule
- Every 6 months for pavé and micro-pavé rings: small prongs loosen faster than large ones, and a loose stone in a pavé setting can fall out without warning.
- Every 12 months for standard prong settings: prong check, tightening, re-polishing, and ultrasonic cleaning.
- Every 18–24 months for bezel and channel settings: these are lower-risk, but the metal rim and channel walls can wear thin over time and need inspection.
Pavé and micro-pavé settings need more frequent professional attention than bezel or channel settings, which have no exposed prongs to loosen. Bezel and channel rings are generally lower-risk for catching on fabric, but the metal itself wears gradually and should be checked for thinning.
Pro Tip: If a stone looks slightly tilted or you feel a tiny snag on fabric where there wasn’t one before, stop wearing the ring immediately and take it to a jeweler. A loose stone caught early costs a prong-tightening fee. A lost stone costs the stone.
For softer gems like morganite or aquamarine, inspect the setting visually every few weeks. These stones are more vulnerable to chipping at the girdle if a prong shifts even slightly.
How do you prepare visuals and references for your designer?
The clearest design brief produces the fewest revision rounds. Collect these before your first meeting.
What to bring to the design consultation
- Reference photos: Pull 5–10 images that show the arrangement, stone shape, and band style you’re drawn to. Pinterest boards work; so does a folder of saved screenshots.
- Ring size: Get sized professionally, not with a string. Finger size changes with temperature and time of day; get sized at the end of the day when fingers are slightly larger.
- Stone details: If you have a stone, bring the grading report. If you’re choosing one, note the shape, approximate carat weight, and any color or clarity preferences.
- Metal preference: White gold, yellow gold, rose gold, or platinum. If you’re unsure, bring photos of jewelry you already wear.
- Lifestyle notes: Active job, gym use, manual work, or primarily desk and social wear. This directly affects setting choice.
- Budget range: Give a real number. A jeweler who knows the budget can steer you toward arrangements that are achievable rather than designing something that needs to be scaled back later.
Design prompts that help your jeweler
- “Halo subtle, not dramatic — I want the center to read as one stone, not a cluster.”
- “Low-profile for daily wear — nothing that catches on sleeves.”
- “Accent stones in baguette, not round — I want the Art Deco geometry.”
- “Band width no wider than 2 mm — I have narrow fingers.”
How to evaluate CAD renders
Request top-down, side, and three-quarter views. The top-down view shows stone-to-band proportion. The side view shows profile height, which matters for daily wearability. Ask for a render with your actual stone dimensions overlaid if possible. Check that the halo gap (if applicable) is consistent around the center, that prong placement looks even, and that the band tapers the way you expect.
Pro Tip: Ask for the CAD render to include a human hand for scale. A ring that looks elegant in isolation can look very different at actual finger scale. This one request eliminates most proportion surprises before fabrication.
| Design element | What to check in the CAD | Why it matters |
|---|---|---|
| Halo gap | Even spacing around center | Uneven gaps look amateurish in person |
| Prong placement | Symmetrical, not blocking the table | Off-center prongs reduce brilliance |
| Band taper | Gradual, not abrupt | Abrupt taper looks cheap |
| Profile height | Under 5 mm for daily wear | High profiles catch on fabric |
| Stone-to-band ratio | Center visually dominant | Oversized bands dwarf the stone |
Belviaggiodesigns walks through the full custom ring design process in detail, including what to expect at each stage from consultation through final inspection.
How Belviaggiodesigns supports your stone arrangement choices
Belviaggiodesigns handles custom arrangements through a structured process: consultation, stone selection or verification of customer-supplied stones, CAD renders, wax model approval, fabrication, setting, quality inspection, and insured shipping.
Process highlights:
- Every custom ring starts with the stone’s exact dimensions. The setting is engineered to fit the gem, not adjusted after the fact.
- CAD renders are provided before any metal is cut. Clients can request changes at this stage at no additional cost.
- Belviaggiodesigns offers ethically sourced and lab-grown stone options, including lab-grown diamonds and moissanite, for buyers prioritizing sustainability.
- A custom-design deposit secures the consultation and design work. The balance is due before shipping.
- Finished rings are inspected before shipping, and transit is insured for customer-supplied stones.
Pro Tip: When supplying your own stone, ask Belviaggiodesigns for the exact millimeter dimensions required for your chosen arrangement before shipping the stone. Confirming fit before the stone leaves your hands avoids delays.
[Insert author credentials/bio for Stacy to establish expertise]
[Insert testimonials or customer reviews]
[Insert proprietary data or case studies]
Key Takeaways
The most durable and visually successful custom ring comes from matching the arrangement to a specific goal, choosing a setting that fits the wearer’s lifestyle, and allocating budget to the center stone before the metalwork.
| Point | Details |
|---|---|
| Match arrangement to goal | Halo and pavé maximize sparkle; bezel and channel protect active-lifestyle wearers. |
| Use the 2:1:1 ratio | For three-stone rings, side stones should be roughly half the visual size of the center. |
| Budget allocation | Allocate 60–75% of the total budget to the center stone when optical quality is the priority. |
| Plan for timeline | Simple designs take 4–6 weeks; complex multi-stone arrangements take 10–16 weeks. |
| Belviaggiodesigns | Offers custom arrangements built around your stone’s exact dimensions, with CAD approval before fabrication. |
The detail most buyers overlook
Most people spend weeks choosing a stone and about 20 minutes thinking about the arrangement. That’s backwards. The arrangement determines how the stone reads on the finger, how much maintenance the ring will need for the next 30 years, and whether the wearer can actually live in it daily.
The halo is the most popular arrangement for a reason: it works. But it’s also the arrangement most likely to disappoint buyers who didn’t think through the maintenance side. Those small accent stones in a micro-pavé halo are beautiful, and they loosen. Not immediately, but over years of daily wear, a few will shift. That’s not a defect; it’s physics. A buyer who knows this going in schedules the annual check. A buyer who doesn’t know this is upset when it happens.
The other thing most guides skip: the arrangement has to fit the wearer’s hand, not just the stone. A dramatic double halo on a size 4.5 finger looks like a costume piece. A clean east-west oval on a size 7 finger looks like it was designed for that hand. Scale matters as much as style, and the only way to see it accurately is with a scaled CAD render or a wax model on the actual finger.
The bypass and tension settings are the ones I’d push buyers to think harder about before committing. Both are visually striking. Both are also the hardest to resize and the most structurally specific. If your ring size is stable and you’re confident in the design, they’re worth it. If you’re still figuring out your size or you know your weight fluctuates, a prong or bezel setting gives you more flexibility over time.
Start your custom stone arrangement with Belviaggiodesigns
Designing a ring around a specific stone arrangement is exactly what Belviaggiodesigns does. Whether you’re drawn to a halo-set black diamond, a colored-stone three-stone layout, or something entirely your own, the process starts with a consultation and a custom-design deposit that locks in your CAD work.
Every design is built around your stone’s exact dimensions, reviewed at the CAD stage before any metal is cut, and inspected before it ships. Payment plans are available. To start, place a custom-design deposit and book your consultation. Belviaggiodesigns will take it from there.
Useful sources and further reading
- How to Commission a Custom Ring — Crescent Gems: Covers the full custom-ring process from loose stone to finished piece, including budget allocation and CAD/wax model stages.
- 27 Types of Ring Settings Explained — Twirl Weddings: Comprehensive breakdown of setting types with pros, cons, and best stone shapes for each.
- Custom Engagement Ring Design Process — TheDiamondPrice: Timeline and cost guidance by design complexity, with notes on CAD and wax model approval.
- How to Add Gems to a Ring — Quick Jewelry Repairs: Practical guide to modification methods and when a full remake is required.
- How to Prong Set Stones — Halstead: Step-by-step technical reference for prong-setting methods and tools.
- Belviaggiodesigns Custom Jewelry Guide: Broader primer on custom jewelry design, personalization, and what to expect from the process.
FAQ
How much does it cost to get stones set in a ring?
Setting cost depends on the setting type and number of stones. Simple prong or bezel settings for a single stone typically run less than elaborate pavé or filigree work, which requires significantly more bench labor and raises both cost and lead time.
What is the 2:1:1 rule in jewelry?
The 2:1:1 rule is a size-ratio guideline for three-stone rings: the center stone should be visually twice the size of each side stone, creating a balanced composition where the side stones frame rather than compete with the center.
Can a jeweler add stones to an existing ring?
Yes, in many cases. Common methods include head replacement, adding small bezels or prong clusters to the shank, flush setting, and tube setting. Elaborate existing designs may require a full mounting replacement rather than modification.
How are stones actually inserted into a ring setting?
For prong settings, the jeweler cuts a seat inside each prong, positions the stone, then uses a prong pusher and burnisher to fold the prong tip over the stone’s girdle. For bezel settings, the metal rim is pressed and burnished evenly around the stone’s edge. Both methods require precise stone-to-seat fit.
How long does a custom multi-stone ring take to make?
Custom timelines run 4–6 weeks for simple solitaires, 6–8 weeks for halo or pavé designs, 8–12 weeks for complex vintage work, and 10–16 weeks for very complex multi-stone arrangements.
Recommended
- Ring settings explained: types, styles & custom options – Bel Viaggio Designs, LLC
- Ring Band Types: Your Complete Style Guide – Bel Viaggio Designs, LLC
- Why Choose a Custom Engagement Ring? 5 Reasons to Make It Yours – Bel Viaggio Designs, LLC
- Why Choose a Custom Engagement Ring? 5 Reasons to Make It Yours – Bel Viaggio Designs, LLC